Lash Root Cause Analysis: 8 Evidence Checks After a Quality Defect

Share
Lash Root Cause Analysis Buyer Summary
Lash root cause analysis should define the defect and scope, preserve the affected lot, compare approved references, review changes in materials, methods, people, tools and environment, test causal hypotheses and verify that corrective action addresses both occurrence and detection gaps.
Lash root cause analysis should define the defect precisely, preserve the affected lot, compare approved references, map where the condition could have been created or missed, test evidence across people, material, method, equipment and environment, then verify that the proposed cause explains the facts and supports an effective corrective action.
What Is Lash Root Cause Analysis?
Lash root cause analysis is a structured investigation used after a confirmed or credible quality defect to determine why the condition occurred and why existing controls did not prevent or detect it.
The root cause is not automatically the person who touched the product last. “Operator error,” “supplier issue” and “inspection missed it” are starting statements, not complete conclusions. A useful cause identifies a correctable system condition and is supported by evidence from the affected batch.
OSHA's incident-investigation guidance recommends looking beyond immediate causes and blame to underlying equipment, procedure, training and system factors. Although that guidance addresses workplace incidents, the same evidence discipline is useful in product-quality investigation. This article adapts the approach for lash manufacturing and is not workplace-safety or legal advice.
Contain First, Analyze Second
Before testing causes, identify and hold potentially affected inventory, preserve the original defect, secure the relevant records and prevent uncontrolled rework. Containment protects the customer and preserves evidence; it does not prove the final root cause.
Record what is known, what is assumed and what remains unknown. This separation prevents a plausible story from becoming an unsupported conclusion.
8 Evidence Checks After a Quality Defect
1. Define the Defect in Measurable Terms
State the exact condition, location, frequency and requirement. Replace “curl is bad” with an observable statement such as “18 of 125 inspected fans are below the approved C-curl reference at the outer third of the strip.”
Include photographs, measurements, defect classification and the approved limit. A vague problem statement produces vague causes.
2. Confirm Product, Lot and Scope
Verify SKU, lot, production date, line or cell, order, packaging and affected quantity. Compare the defect across retained samples, work-in-process, finished stock and adjacent lots when risk justifies it.
3. Compare the Approved Reference
Review the specification revision, master sample, artwork and acceptance method that governed the batch. Confirm that the reference itself was current, available and understood at the workstation.
4. Build a Timeline of Changes
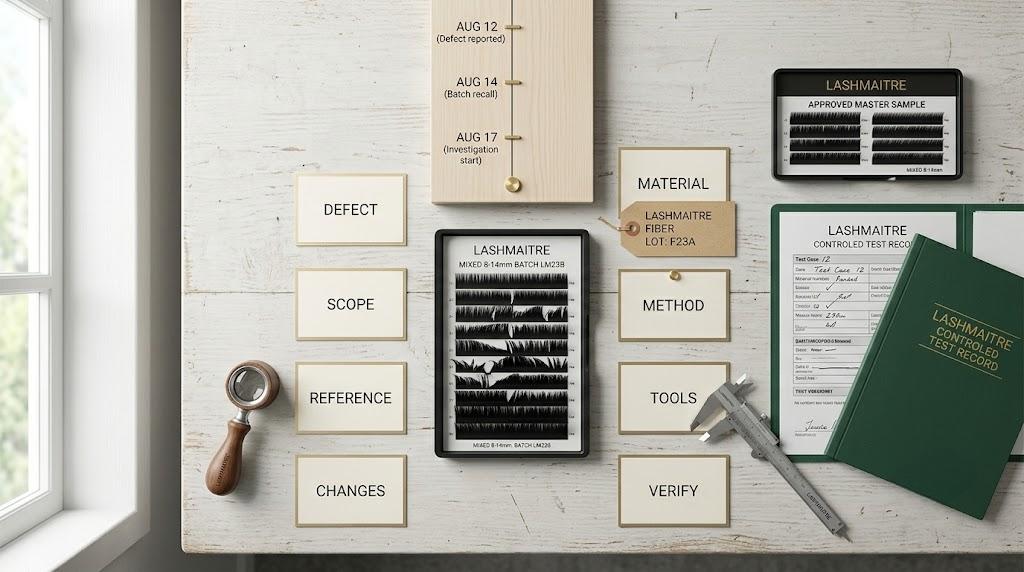
Map when the product last met requirements and when the defect first appeared. Review changes in material lots, operators, tools, equipment settings, environment, instructions, workload, rework and packaging components.
The purpose is not to assume that every change caused the problem. It is to identify testable differences between conforming and nonconforming production.
5. Examine Material Evidence
Compare fiber, adhesive if applicable, trays, cards and packaging lots. Check certificates, incoming results, storage, issue records and any material substitutions. A material hypothesis should explain why only certain lots, rows or times were affected.
6. Examine Method, People and Training
Review the actual work method against the controlled instruction. Interview operators without leading questions. Confirm training, visual standards, workload, handoffs and whether the method can be performed consistently under normal conditions.
Do not close the analysis with “operator failed to follow procedure” until asking why the failure was possible, undetected or repeated.
7. Examine Equipment, Tools and Environment
Check calibration or verification status, maintenance, fixtures, magnification, lighting, temperature, humidity and workstation condition where relevant. Recreate the condition only with a controlled test that does not mix evidence or expose saleable stock.
8. Verify the Cause and Detection Gap
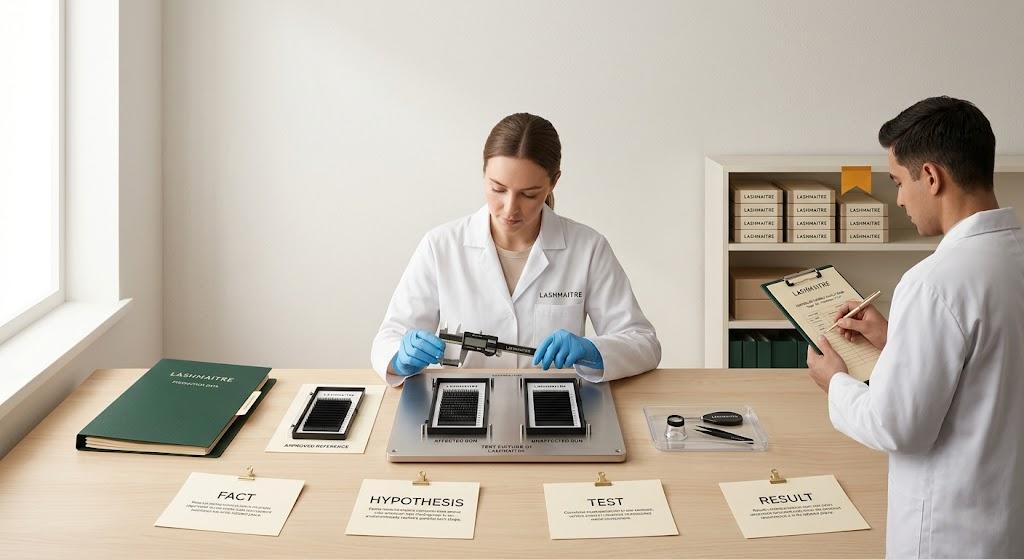
A proposed root cause should explain the defect pattern, timing and scope. Test it where practical: reproduce the failure under the suspected condition, remove the condition and show improvement, or compare affected and unaffected data.
Also identify why the control plan did not detect the problem earlier. Correcting occurrence without correcting detection leaves the same escape path open.
FACT / HYPOTHESIS / TEST / CONCLUSION
| Stage | Required content | Weak example | Stronger evidence |
|---|---|---|---|
| FACT | Direct observation or controlled record | “Fans look uneven” | 18/125 below approved reference in rows 9-12 |
| HYPOTHESIS | Testable causal statement | “Operator problem” | Fixture angle shifted after adjustment and altered fan placement |
| TEST | Comparison or controlled challenge | Ask whether it happened | Compare fixture setting, unaffected run and controlled reproduction |
| CONCLUSION | Cause supported by evidence and scope | “Retrain staff” | Locking feature failed; setting drift explains timing and pattern |
Keep alternative hypotheses until evidence rules them out. The most convenient explanation is not necessarily the true cause.
Turning the Cause Into Corrective Action
Corrective action should address the confirmed cause, responsible owner, due date, affected documents or equipment, retraining where necessary and an effectiveness check. If the cause is not verified, label the conclusion as probable or inconclusive and maintain appropriate containment.
A supplier corrective action request can manage commitments and closure, but it should not replace the analysis itself. Attach the evidence trail so the buyer can understand why the proposed action should prevent recurrence.
Common Root-Cause Failures
- Starting with a preferred answer and selecting only supporting evidence.
- Treating human error as the final cause.
- Mixing occurrence cause with escape or detection cause.
- Comparing the defect with the newest specification instead of the applicable revision.
- Changing several variables at once during a test.
- Destroying or reworking the affected sample before evidence is recorded.
- Selecting corrective action before the cause is verified.
- Closing the investigation because the next batch passed once.

Lash Root Cause Analysis FAQ
How do you perform root cause analysis for a lash defect?
Define the defect, contain and identify the affected lot, compare approved references, review changes and evidence across material, method, people, tools and environment, then test whether the proposed cause explains the pattern.
Is operator error a root cause?
Usually it is incomplete. Ask why the error was possible, why the method or training did not prevent it and why controls did not detect it before release.
Do all lash defects need a full root cause analysis?
Use a risk-based rule. Repeat, severe, safety-related, systemic or buyer-impacting defects normally justify deeper analysis; an isolated, fully understood minor issue may use a simpler documented investigation.
How do you know a root cause is correct?
The cause should explain the observed timing, pattern and scope and be supported by a controlled comparison, reproduction, removal test or other objective evidence. Effectiveness monitoring should then show that recurrence is reduced.
Investigate With Controlled References
Build investigations around documented lash quality control, traceable lash extension samples, a controlled private label lash program and a detailed wholesale lash inquiry. Clear requirements and approved references make causal evidence faster to test and easier to defend.
Authority reference: OSHA Incident Investigation guidance.
After root cause and corrective action are documented, complete a lash CAPA effectiveness check using subsequent lots, recurrence data and a challenge test before closure.

Lash Maitre: Your Trusted Partner in Eyelash extension Solutions
Lash Maitre is dedicated to providing professional insights and tips in the eyelash extension industry. Sharing the latest trends, techniques, and product knowledge, Lash Maitre helps lash artists and enthusiasts enhance their skills, stay inspired, and achieve the perfect lash experience.