This guide is for lash salons, lash brands, academies, ecommerce sellers and distributors comparing lash extension adhesive supply options. Use it to confirm product specs, sample testing, MOQ, private label packaging and reorder planning before requesting a wholesale quote from LASHMAITRE.
Introduction: Why Removal is Your Most High-Stakes Service
In the lifecycle of a lash client, the application gets all the glory, but the eyelash extension adhesive remover determines the loyalty. A stinging, painful, or damaging removal experience is the number one reason clients take “lash breaks” and never return.
For the B2B salon owner, viewing removal as a “throwaway” service ($20 or free) is a strategic error. It is the bridge between sets. A safe removal proves your expertise, preserves the natural lash health, and prepares the canvas for the next full set. If you burn their eyes, they won’t trust you with the refill.
This comprehensive guide serves as your operational manual. We will dissect the viscosity differences between removers, analyze the controversy surrounding GBL (Gamma-Butyrolactone), and provide a roadmap to sourcing eyelash extension adhesive remover that allows you to market a “Zero-Damage Guarantee.”
The Science of Dissolution: Gel vs. Cream vs. Liquid
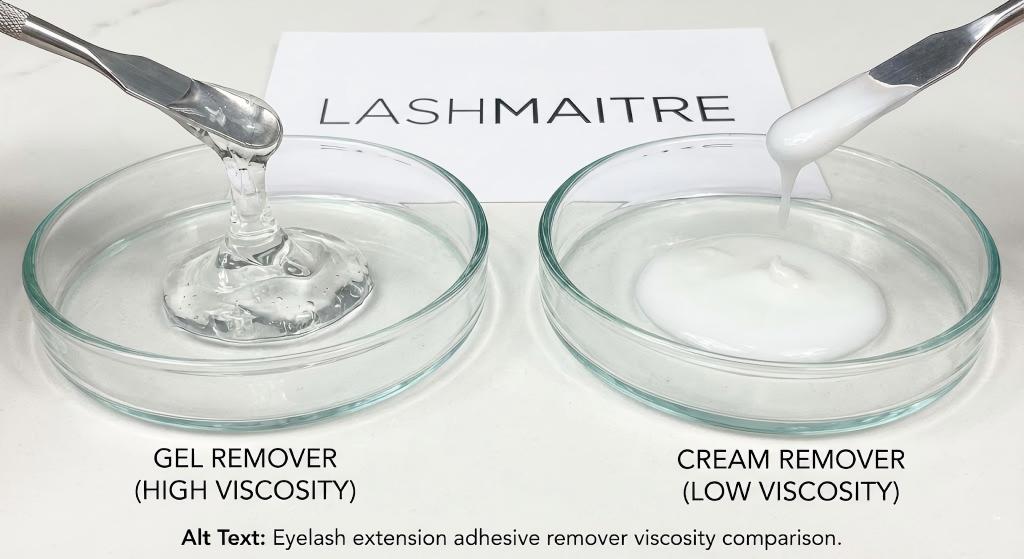
Not all removers are created equal. The state of matter (viscosity) determines safety.
1. Liquid Removers (The Old School)
Viscosity: Water-like.
Speed: Extremely fast (dissolves glue in seconds).
Risk:Critical. It runs immediately into the eyes due to gravity and body heat, causing intense chemical burns and shock polymerization.
Verdict: Strictly for cleaning tweezers and jade stones. Never use on clients.
2. Gel Removers (The “In-Between”)
Viscosity: Jelly-like consistency.
Speed: Fast (3-5 minutes).
Risk:High. Body heat melts gel, causing it to thin out and run into the tear duct. Many gels contain high solvents (Acetone/GBL) that sting vapors.
Verdict: Good for spot removal (1-2 lashes), risky for full removal.
3. Cream Removers (The B2B Standard)
Viscosity: Thick paste (like clay or peanut butter).
Speed: Moderate (5-10 minutes).
Risk:Low. It sits exactly where you place it. It does not run, even when the client sits up.
Verdict: The only safe option for full-set removals.
Remover Comparison Matrix
Feature
Liquid Remover
Gel Remover
Cream Remover
Consistency
Watery
Gelatinous
Thick Paste
Runny Risk
Extreme
High (with heat)
Zero (Stable)
Application
Tool Cleaning
Spot Correction
Full Removal
Sting Factor
High
Medium/High
Low/None
Safety Level
Unsafe for Eyes
Advanced Techs Only
All Levels
Data Insight: Insurance claims regarding “Chemical Eye Burns” in salons dropped by 65% in businesses that mandated the switch from Gel to Cream Removers for all full removal services (2025 Industry Safety Report).
Not all removers are created equal! 🤔💧 Viscosity plays a huge role in safety and speed. Check out the difference between our Gel and Cream removers.
Which consistency is your go-to for safely dissolving adhesive? Let us know below! 👇 #lashremover #gelvscream #lashmaitre #lashtips #lashadhesive
Ingredient Analysis: GBL, Propylene Carbonate, and Eye Safety
As a business owner, you must know what is in your jars. The regulatory landscape for removers is shifting.
The GBL Controversy
Gamma-Butyrolactone (GBL) is a powerful solvent often used in removers.
Pros: Dissolves cyanoacrylate incredibly fast.
Cons: In some countries (like Australia and parts of the EU), it is a controlled substance (precursor to GHB). It can be harsh on the skin.
B2B Tip: Check your local regulations. Selling GBL-based removers without a license can be illegal.
The Modern Alternative: Propylene Carbonate
Pros: Biodegradable, non-toxic, gentle on skin.
Cons: Takes slightly longer to work (extra 2-3 minutes).
Marketing: “GBL-Free” and “Sensitive Skin Safe” are powerful marketing claims for your salon.
Fragrance & Color
Scent: Cantaloupe, Grape, Strawberry. Scents mask the chemical smell of the solvent.
Color: Bright colors (Pink/Blue) help visibility. You can see exactly where the cream is applied, ensuring you remove it all before washing.
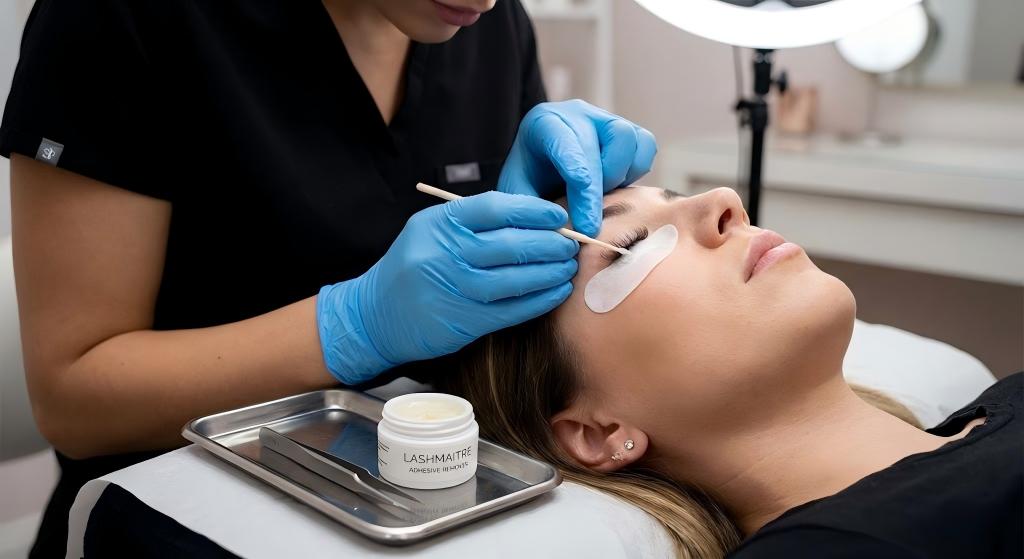
The “Zero-Sting” Protocol: A Masterclass in Application
Train your staff on this exact protocol to ensure clients never feel a thing.
Step 1: Secure the Lower Lids
Place under-eye pads over the lower lashes.
Crucial: Apply a layer of paper tape on top of the pads to catch the cream residue during cleanup.
Step 2: The Application (The “Sandwich”)
Using a micro-swab or a lip applicator, apply the eyelash extension adhesive remover to the bonding point only.
Do Not: Touch the skin or the eyelid line. Leave a 1mm gap.
Technique: Sandwich the lashes between a layer of cream on top and bottom.
Step 3: The Incubation
Let it sit for 10-15 minutes.
Error: Techs try to pull too early. This causes pain (lash stress).
Tip: Cover the eyes with cling wrap (plastic film) to challenge body heat. Heat accelerates the chemical reaction, cutting removal time by 30%.
Step 4: The “Banana Peel” Removal
Use tweezers to gently slide the extensions off. They should slide like butter. If there is resistance, add more cream and wait 2 mins. Never pull.
Step 5: The Dry Cleanse (Most Important)
BEFORE adding water, wipe off all cream residue with dry tissues/swabs.
Chemistry Alert: If water touches the cream residue while it still holds dissolved glue, the glue will “Shock Cure” instantly, turning into white, hard rocks (blooming) on the client’s natural lashes. This is a nightmare to fix.
Removal is an art form too! 🎨🧴 Gentle, safe, and effective—that’s the goal.
Mastering how to use lash removal cream professionally ensures your client’s natural lashes stay healthy and strong for their next set. Apply, wait, and let the cream do the work! ⏳ No pulling, no pain, just clean results. ✨ #lashremoval #lashsafety #lashcreamremover #lashmaitre #lashtraining
Troubleshooting: Removing “Concrete” Mega Volume Sets
Sometimes, a client comes in with “Concrete Lashes”—too much glue, poorly applied by another salon. Standard cream might struggle.
The “Cracking” Method
Apply the cream.
Use the ridged handle of your tweezers (or specialized removal pliers) to gently squeeze the base of the glue bond.
This creates micro-cracks in the cyanoacrylate, allowing the eyelash extension adhesive remover to penetrate deeper and faster.
The Double Process
For massive globs of glue:
Apply cream, wait 10 mins.
Remove loose lashes.
Re-apply fresh cream to the remaining stubborn clusters.
Wait 5 mins.
Retail Strategy: The Pros and Cons of DIY Removal Kits
Should you sell eyelash extension adhesive remover to clients for home use? This is controversial.
The Risk
If a client gets remover in their eye at home, they will blame you. They may cause chemical burns or rip out their natural lashes.
The Opportunity (The DIY Kit)
Despite risks, clients will try to remove lashes with olive oil or by pulling if they can’t get an appointment. Selling a safe kit controls the damage.
Pitch: “Reset your natural lashes and prepare them for new growth.”
The “Foreign Fill” Policy
“We do not fill other salons’ work. We offer a Complimentary Removal with the purchase of a new Full Set.”
Why: This ensures you start with a clean canvas, guarantees retention, and removes the risk of working over bad work.
Conclusion
Eyelash extension adhesive remover is the unsung hero of the lash industry. By choosing high-viscosity, GBL-free formulas and mastering the “Dry Cleanse” protocol, you protect your clients from pain and your business from risk.
Stop using gels that sting. Upgrade to creams that comfort. Your retention rates—and your clients—will thank you.
Upgrade your removal game.
Shop our “Zero-Sting” Cream Removers and Airless Pump Solutions.
A: High-quality eyelash extension adhesive remover should not burn if applied correctly. Unlike liquid or gel removers that can run into the eye due to body heat, cream removers have a thick, clay-like consistency that stays exactly where placed. Burning only occurs if the cream touches the eyelid skin or if the client opens their eyes during the process.
Q: How long do you leave lash removal cream on?
A: Typically, professional eyelash extension adhesive remover needs to sit for 5 to 10 minutes to fully dissolve the cured cyanoacrylate adhesive. Using a plastic wrap covering can challenge body heat and speed up this process. Do not pull the lashes before the glue is dissolved, as this causes pain and damage.
Q: Can I use Vaseline or Coconut Oil instead of removal cream?
A: While oils can weaken the bond over time, they are ineffective for immediate, safe removal. Rubbing oil vigorously on the eyes can cause lash stress (ripping out natural lashes) and make the eyelids puffy. Professional cream remover breaks the chemical bond chemically, allowing extensions to slide off without friction.
Q: Why did my lashes turn white after using remover?
A: This phenomenon is called “Shock Polymerization” or “Blooming.” It happens when you try to rinse the remover off with water before wiping all the dissolved glue residue away. The water reacts with the semi-dissolved glue and hardens it instantly into white rocks. Always dry-wipe the residue completely before washing.
Share your lash extension specs, estimated quantity, packaging needs and target market. LASHMAITRE will recommend suitable SKUs, sample options, lead time and OEM/private label pricing.
Lash Maitre: Your Trusted Partner in Eyelash extension Solutions
Lash Maitre is dedicated to providing professional insights and tips in the eyelash extension industry. Sharing the latest trends, techniques, and product knowledge, Lash Maitre helps lash artists and enthusiasts enhance their skills, stay inspired, and achieve the perfect lash experience.
Latest Post
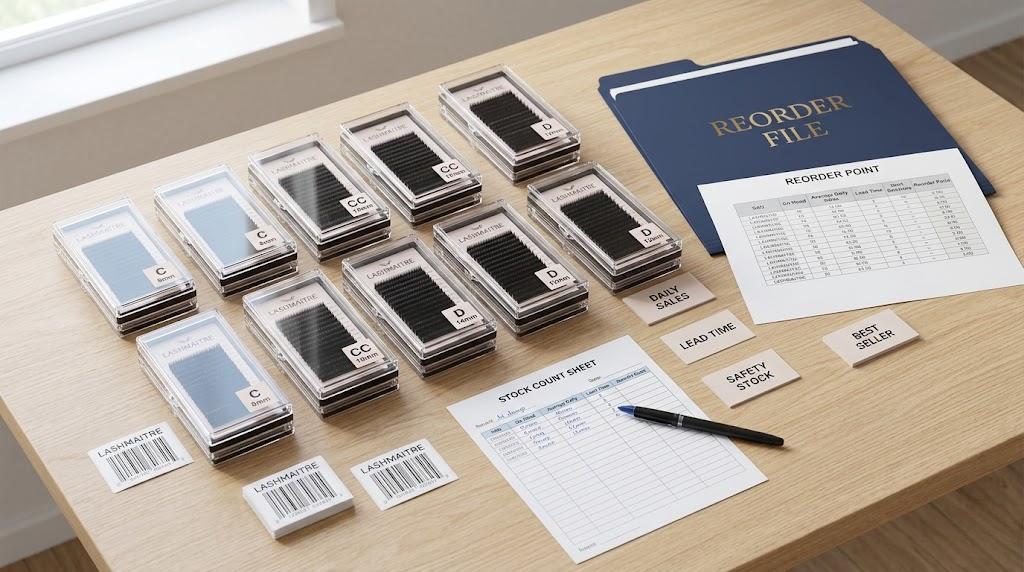
Lash Inventory Reorder Point: 8 Restock Signals for Lash Brands
June 19, 2026
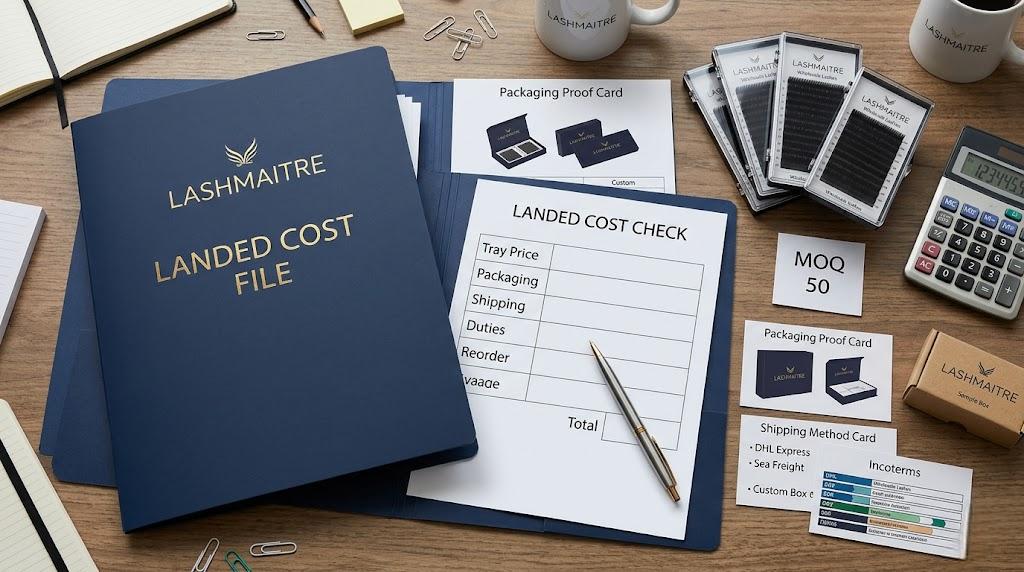
Lash Extension Landed Cost: 8 Price Checks Before Wholesale Orders
June 19, 2026
Eyelash Extension Import Documents: 8 Shipment Checks for Wholesale Buyers
June 19, 2026
EU Cosmetic Ingredient Rules 2026: 10 Critical Lash Buyer Checks