This guide is for lash salons, lash brands, academies, ecommerce sellers and distributors comparing eyelash extensions supply options. Use it to confirm product specs, sample testing, MOQ, private label packaging and reorder planning before requesting a wholesale quote from LASHMAITRE.
Introduction: Why “Freestyling” is Costing You Clients
In the hyper-competitive beauty landscape of 2026, the era of “one size fits all” is over. Clients are more educated than ever, demanding bespoke looks that enhance their unique facial features rather than generic “long lashes.” For the B2B salon owner, the eyelash extension map is not just a sharpie mark on a gel pad; it is the blueprint for client retention, high-ticket pricing, and brand differentiation.
“Freestyling”—applying extensions without a predetermined map—leads to inconsistency. One eye may look different from the other, or a client might love their lashes one month and hate them the next because the stylist couldn’t replicate the design. An eyelash extension map provides the engineering consistency required to scale a salon business. It transforms your staff from “lash applicators” into “lash architects.”
This comprehensive white paper serves as your operational manual. We will dissect the geometry of eye shapes, analyze the profitability of offering “Corrective Mapping” as a premium service, and provide a roadmap to sourcing the specific curls and lengths required to execute complex maps like the “Kim K” or “Fox Eye” flawlessly.
The Physics of Ocular Architecture: Analyzing the Canvas
Before a single dot is drawn on the eye pad, a diagnostic analysis must occur. You cannot map what you do not understand.
The 3-Point Analysis System
To create a successful eyelash extension map, train your team to analyze three critical vectors:
The Horizontal Plane (Eye Shape):
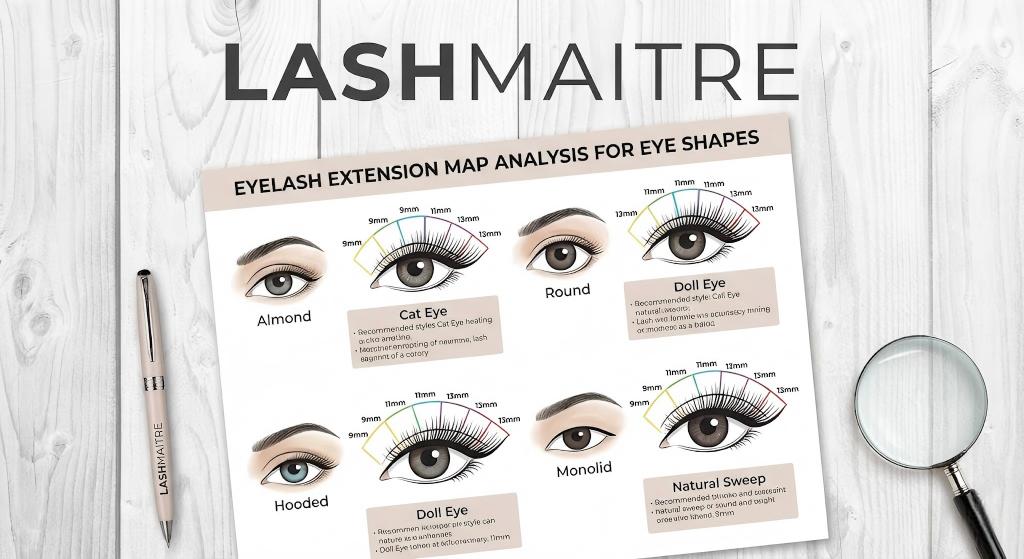
Almond: The universal donor. Can wear almost any map.
Round: Needs elongation (Cat/Kitten) to avoid looking “startled.”
Asian/Monolid: Needs vertical lift (Doll) or projection (L-Curl) to open the eye.
The Vertical Plane (Eye Set):
Wide Set: Needs emphasis on the inner corners (Reverse Cat Eye) to draw the eyes together.
Close Set: Needs emphasis on the outer corners (Cat/Squirrel) to pull the eyes apart.
The Depth Plane (Prominence):
Deep Set: Requires longer lengths (start at 9-10mm) just to clear the brow bone.
Protruding: Requires shorter lengths (max 11mm) to recede the eye visually.
Data Insight: A 2025 consumer survey found that 68% of clients who switched salons did so because they felt their previous lashes “didn’t suit their face.” Customized mapping is the #1 driver of loyalty.
One size does NOT fit all! 🙅♀️ The sourcing notes to a perfect set is a customized eyelash extension map. Whether your client has Almond, Round, Hooded, or Monolid eyes, our guide helps you choose the perfect style to enhance their natural beauty. 📏 Save this cheat sheet for your next appointment! 📌 #lashmapping #lashtips #lashartist #lashmaitre #wispylashes
The Core Four: Technical Breakdown of Essential Maps
Every lash artist must master these four foundational maps. They cover 90% of client requests.
1. The Natural Eye (The Enhancer)
The Blueprint: Follows the natural growth pattern of the client’s lashes.
The Peak: The longest lengths are usually at the arch of the eyebrow (outer middle).
The Lengths: Gentle transitions (e.g., 8-9-10-11-10-9mm).
Best For: First-time clients, corporate professionals, deep-set eyes.
2. The Cat Eye (The Elongator)
The Blueprint: Short inner corners graduating to long outer corners.
The Peak: The last sector of the outer eye.
The challenge: If you keep the length long all the way to the last lash, it will droop.
The Fix: Always drop the length by 1-2mm on the very last 5-10 natural lashes to lift the corner.
Best For: Round eyes, close-set eyes.
Avoid On: Downturned eyes (makes them look sad) or wide-set eyes.
3. The Doll Eye (The Opener)
The Blueprint: Longest lengths in the middle of the eye (above the iris/pupil).
The Peak: Center zone.
The Lengths: Symmetrical taper (e.g., 8-10-12-12-10-8mm).
Best For: Monolids, wide-set eyes, hooded eyes (opens them up vertically).
Avoid On: Round eyes (creates a “surprise” look).
4. The Squirrel Eye (The Lifter)
The Blueprint: A hybrid of Cat and Natural.
The Peak: Under the arch of the eyebrow, followed by a significant drop in length at the outer corner.
Why It’s Superior: It gives the lift of a Cat Eye without the weight drag at the corner. It is the most universally flattering map for anti-aging.
Best For: Hooded eyes, downturned eyes, high-brow arches.
Advanced Mapping: Wispy, Wet Look, and The “Eyeliner Effect”
To charge premium prices, you must offer trending styles. These require complex, multi-layer mapping.
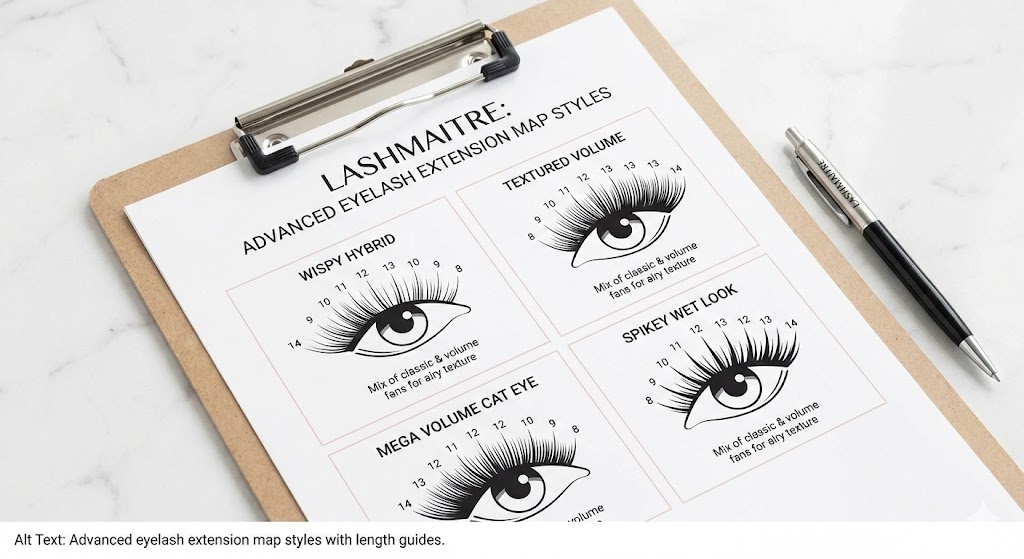
1. The Wispy / Kim K Map (The Texture King)
This map relies on “Spikes” (un-fanned or closed fans) being 2-3mm longer than the base layer.
The Map: Mark your “Spike Points” first on the eye pad. usually 7-10 spikes per eye.
The Formula:
Spikes: 11mm, 12mm, 13mm, 14mm (placed at intervals).
Base Layer (Volume Fans): 8mm, 9mm, 10mm, 11mm.
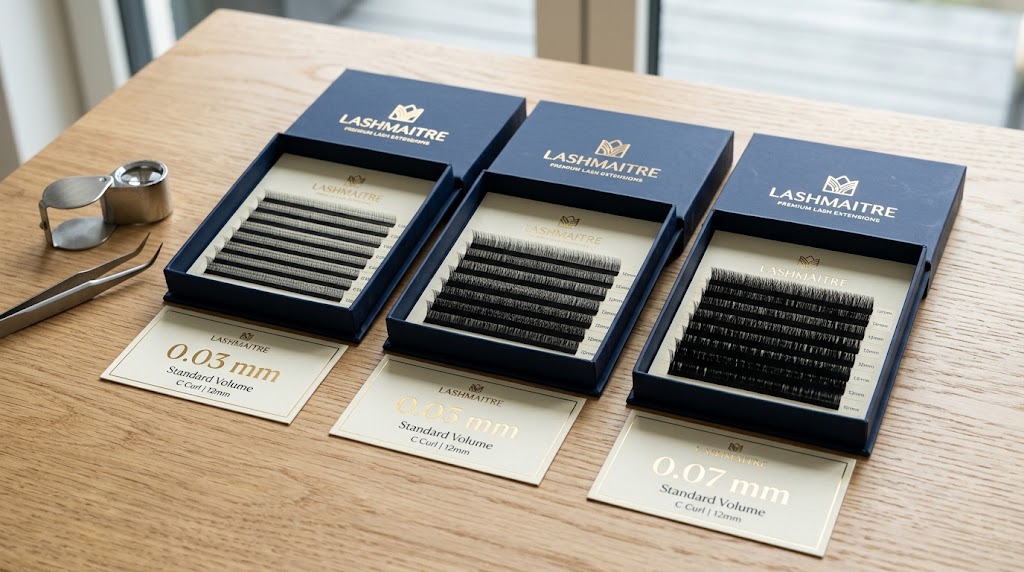
Inventory Need: Requires stocking 0.07mm for spikes and 0.05mm for the base.
2. The Wet Look (The Gloss Effect)
Similar to Wispy but uses only closed fans or narrow spikes for the entire set.
The Map: Usually follows a Doll or Squirrel shape.
The Look: Mimics the appearance of lashes fresh out of the shower. High gloss, defined texture.
3. The Eyeliner Effect (The L-Curl Specialist)
Uses extremely short, dense volume fans (L-Curl or M-Curl) to create a dark line at the base, with a sharp flick at the end.
The Map: Short lengths (5mm-8mm) for 75% of the eye, jumping to 10mm-11mm L-Curl at the outer corner.
Target: Clients who wear winged liner daily.
Ready to move beyond the basics? 🚀 Clients today want texture, spikes, and drama! Our advanced styling guide covers the hottest trends, including the perfect wispy lash map for that coveted “strip lash” effect. 💖
Mastering these complex maps allows you to charge premium prices for custom styling. Which look is your most requested? 👇 #lashtrends #wispylashes #lashmapping #lashmaitre #volumelashes
Corrective Mapping: The Non-Surgical Eye Lift
This is your highest-value service. Position it as “Corrective Styling.”
Correcting Asymmetry
Most clients have one eye smaller or lower than the other.
The Fix: Use a Doll Map on the smaller eye to open it up, and a Natural Map on the larger eye. Or, use a stronger curl (D) on the sleepy eye and a relaxed curl (C) on the open eye.
Lifting the Heavy Hood
Hooded eyes push lashes down.
The Fix: Use the Squirrel Map. By placing the length at the brow arch (the highest point of the lid), you visually lift the weight of the hood.
Curl Strategy: Use L or L+ Curls. Their flat base sits flush on the lid, and the sharp angle reaches out from under the hood before curling up.
The Layering Protocol: Mapping for Texture and Density
A true master does not map all lash layers the same. Natural lashes grow in 3-4 vertical rows (layers).
The “Perfect Line” (Russian Volume)
To achieve that smooth, dense top line:
Bottom Layer: Longest Length (e.g., 12mm).
Middle Layer: Medium Length (e.g., 11mm).
Top Layer: Shortest Length (e.g., 10mm).
Result: When the eye opens, the lashes stack perfectly to create a solid wall of color.
The “Textured/Fluffy” Line (American Volume)
To achieve a wispy, airy look:
Mix Lengths: Apply varying lengths (e.g., 10mm and 12mm) randomly across all layers.
Result: A jagged, feathery topline that mimics natural growth.
Operational Strategy: Standardizing Maps for Staff Scalability
If you run a salon with multiple techs, you need consistency. If Tech A leaves, Tech B must be able to replicate the client’s look.
The “Client Face Chart”
Every client file must contain a mapped Face Chart.
Record: The Map Name (e.g., Squirrel), The Curls used (C/D mix), The Lengths per zone, and the Schematic Drawing.
B2B Benefit: This creates “Vendor Lock-in.” The client knows your salon holds the blueprint to their perfect look.
Pre-Printed Eye Pads
Save time by buying or manufacturing eye pads with pre-printed angle lines. This guides junior technicians on where to place the zones (Inner, Mid, Outer).
Pricing the Map: commercializing Bespoke Design
Stop charging based on “Lash Count.” Charge based on “Design Complexity.”
Service Tiering Model
Service Tier
Map Complexity
Application Time
Price Premium
Signature Set
Standard Maps (Cat, Doll, Natural)
90 Mins
Base Price
Couture Set
Advanced Maps (Wispy, Wet, Eyeliner)
120 Mins
+$30 – $50
Corrective Set
Asymmetry Correction / Heavy Hood
120 Mins
+$40 – $60
Upsell Script:“I notice one of your eyes has a slightly different growth pattern. I recommend our Corrective Styling package. I will custom map each eye differently to create perfect symmetry. It involves mixing curls and is a bit more technical, but the result is a non-surgical lift.”
Inventory Management: Stocking for Complex Maps
You cannot do advanced mapping with just C-Curl 0.15mm trays.
The eyelash extension map is the bridge between a service and an experience. It allows you to tailor your work to the individual anatomy of every client, ensuring retention, satisfaction, and high referrals.
For the salon owner, enforcing strict mapping protocols reduces staff error, standardizes quality, and opens the door to higher pricing tiers. Stop guessing. Start mapping.
Equip your architects.
Shop our specialized L-Curl and Wispy Lash collections.
A: The Natural Eye or Squirrel Eye are the best maps for beginners. The Natural map follows the brow bone and is forgiving. The Squirrel map creates a beautiful lift without the risk of “drooping” the eye, which often happens when beginners attempt a Cat Eye on the wrong eye shape.
Q: How do you map for a Cat Eye look?
A: To map a Cat Eye, divide the eye into 4-5 zones. Start with short lengths (7-8mm) in the inner corner (Zone 1). Gradually increase length through the middle (Zones 2-3). Reach the peak length (e.g., 12-13mm) in the outer zone (Zone 4). Crucial: In the very last small zone (Zone 5, the outer edge), drop the length back down by 1-2mm to prevent the lashes from drooping due to the weak natural lashes at the corner.
Q: Can you mix curls in a lash map?
A: Yes, mixing curls is an advanced technique that yields better results. For example, use a C-curl in the inner corners (where lashes are naturally straighter) and a D-curl in the outer corners for lift. Or, use a C-curl on the bottom layer for density and a D-curl on the top layer for texture. This creates a fluffier, more multi-dimensional look.
Q: What lash map makes eyes look bigger?
A: The Doll Eye (Open Eye) map makes eyes look bigger and rounder. By placing the longest lashes directly in the center of the eye (above the pupil), it creates vertical height, opening up the eye. This is perfect for monolids, deep-set eyes, or anyone wanting a wide-awake look.
Share your lash extension specs, estimated quantity, packaging needs and target market. LASHMAITRE will recommend suitable SKUs, sample options, lead time and OEM/private label pricing.
Lash Maitre: Your Trusted Partner in Eyelash extension Solutions
Lash Maitre is dedicated to providing professional insights and tips in the eyelash extension industry. Sharing the latest trends, techniques, and product knowledge, Lash Maitre helps lash artists and enthusiasts enhance their skills, stay inspired, and achieve the perfect lash experience.
Latest Post
EU Prostaglandin Lash Serum Safety: 2026 Private Label Buyer Guide
August 29, 2026
EU Lash Cleanser Labeling 2026: Private Label Buyer Guide
August 26, 2026
UK Cosmetics Import Alerts: What Lash Aftercare Buyers Should Check
August 24, 2026
Standard Volume Lash Trays Wholesale: 7 Sample Checks for Handmade Fans