Eyelash Extension Tape: 7 Pro Hacks for Faster Isolation and Perfect Layering
Share
Author: LASHMAITRE Team
Topic: Technical Application & Tools
Reading Time: 25 Minutes
Introduction
In the intricate world of lash artistry, we often obsess over the expensive components: the premium faux mink fibers, the rapid-cure adhesives, and the high-precision tweezers. However, there is one humble tool in your trolley that acts as the unsung hero of every perfect set: eyelash extension tape. While it may seem like a basic consumable, the strategic use of this tool separates the novice from the master artist.
Using the correct tape and advanced taping techniques can shave 15 to 30 minutes off a full set application. It allows you to access those impossible inner corners, lift heavy hooded eyelids, and isolate layers for a dense, fluffy finish. For salon owners and distributors, understanding the nuances of eyelash extension tape is not just about inventory; it is about empowering your team to work faster, safer, and cleaner.
In this comprehensive guide, we will move beyond the basics of “taping down lower lashes.” We will explore seven professional hacks for isolation, compare the material science of micropore vs silicone tape for lashes, and reveal how sourcing the right supplies from LASHMAITRE can revolutionize your salon’s workflow in 2026.
The Hidden ROI: Why Tape Selection Matters for Salon Profitability
Before diving into techniques, we must address the business case. Why should a salon owner care about which tape their artists use?
The Economics of Time
In the beauty industry, time is the only non-renewable resource.
- The Scenario: An artist struggles for 10 minutes per client trying to isolate tricky inner corner lashes without tape assistance.
- The Math: 10 minutes x 5 clients = 50 minutes wasted per day. That is one full “Refill” appointment slot lost.
- The Solution: Implementing advanced taping protocols recovers this lost time, directly increasing daily revenue capacity.
Data Insight: Efficiency Trends
According to Statista’s 2025 Salon Operations Report:
- Service Speed: Salons that utilize advanced mechanical tools (including specialized taping methods) report a 20% increase in daily client turnover.
- Client Comfort: 65% of client complaints regarding discomfort relate to the under-eye setup (pads shifting or tape pulling). Using the correct eyelash extension tape reduces irritation claims significantly.
- Revenue Impact: Optimizing service time by just 15 minutes allows for an annual revenue increase of approximately $12,000 per artist (based on average US fill prices).
Material Science: Micropore vs Silicone Tape for Lashes
Not all tapes are created equal. Using a generic office tape is a recipe for a lawsuit. You must understand the specific properties of micropore vs silicone tape for lashes to choose the right tool for the job.
1. Micropore Tape (Paper Tape)
- Characteristics: White, paper-based, breathable, moderate adhesion.
- Best Use: Securing gel pads, mapping lash styles (you can draw on it).
- Cons: The fibers can shed (lint) if cut, which can snag extensions. It can be painful to remove from peach fuzz.
2. Transpore Tape (Plastic/Clear Tape)
- Characteristics: Clear, perforated plastic, very strong adhesion, tears easily in both directions.
- Best Use: The “Lift.” Its strength makes it perfect for lifting hooded eyelids or pulling skin tight.
- Cons: Not breathable. Can be too sticky for the delicate under-eye area.
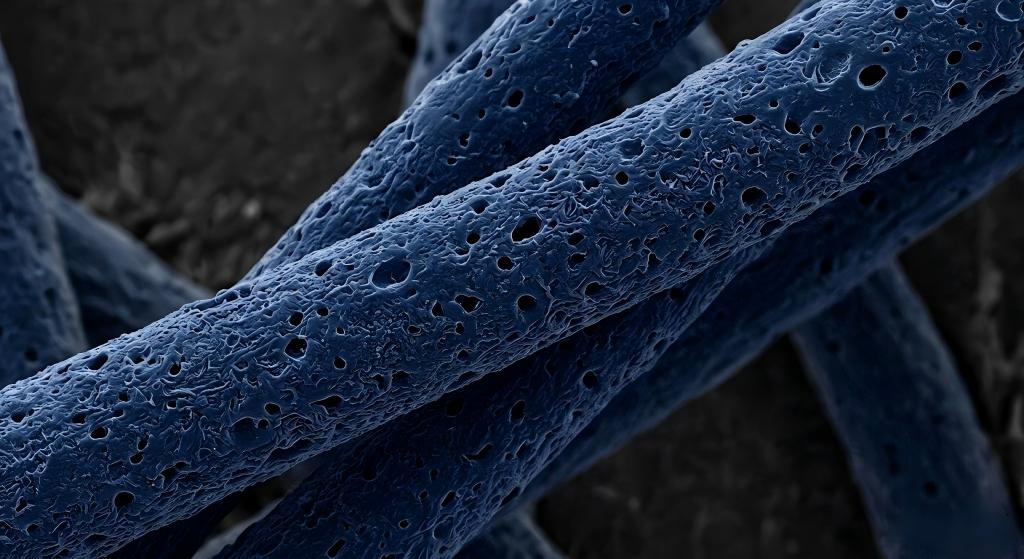
3. Silicone Tape (Blue/Pink Sensitive Tape)
- Characteristics: Soft, gel-like adhesive, repositionable, extremely gentle.
- Best Use: Clients with sensitive skin, or for the “Layering” technique where you tape extensions back (it won’t rip them out).
- Cons: More expensive than paper tape. Less rigid hold.
4. Foam Tape (Microfoam)
- Characteristics: Thick, spongy, multi-directional stretch.
- Best Use: Replacing gel pads entirely for clients allergic to the hydrogel ingredients.
- Cons: Thickness can interfere with isolation if placed too high.
Comparison Table: Lash Tape Performance
| Tape Type | Adhesion Strength | Breathability | Best For | Cost Efficiency |
| Micropore (Paper) | Medium | High | Mapping & Pad Security | High ($) |
| Transpore (Clear) | High | Low | Lifting Lids & Skin | High ($) |
| Silicone (Gentle) | Low-Medium | Medium | Sensitive Skin & Layering | Medium ($$) |
| Microfoam | Medium | Low | Pad Replacement | Low ($$$) |
The “Layering” Method: Lash Isolation Techniques Using Tape
This is the secret weapon for creating those dense, “Mega Volume” sets without sticking lashes together. Mastering lash isolation techniques using tape allows you to work through the natural lash layers systematically.
The Problem: The “Wall” of Lashes
Natural lashes grow in 3-5 rows. If you try to lash them all at once, your tweezers will constantly bump into other lashes, slowing you down.
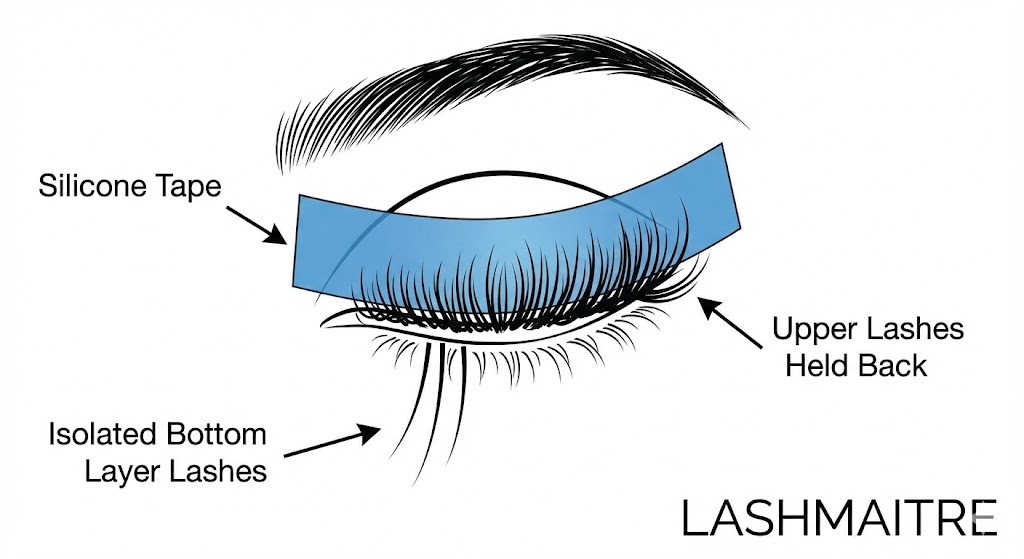
The Solution: Tape-Back Layering
- Step 1: Apply a strip of eyelash extension tape (preferably Silicone, as it releases easily) across all the natural lashes, taping them gently back against the upper eyelid.
- Step 2: Use your tweezers to gently pull the bottom layer of natural lashes out from under the tape.
- Step 3: Lash only this bottom layer.
- Step 4: Once cured, release the tape, and repeat the process for the middle layer.
Why this works: It guarantees 100% isolation. You are never fighting with the top lashes to see the bottom ones. This technique alone can speed up a volume set by 20 minutes.
Conquering the Corners: Taping Back Method for Inner Corners
The inner corners are the bane of every lash artist’s existence. They are short, curly, and often hidden by the nose bridge. The taping back method for inner corners is the fix.
Technique 1: The Horizontal Pull
This is used to expose the inner corner lashes that are hiding near the nose.
- Cut a short piece of Micropore or Transpore tape.
- Place one end on the skin of the eyelid, just outside the inner corner lashes.
- Gently pull the skin horizontally outward (towards the ear).
- Secure the other end of the tape to the temple.
- Result: This stretches the skin, causing the inner corner lashes to fan out and separate from each other.
Technique 2: The Vertical Lift (For Hooded Eyes)
This is used when the eyelid skin sags and covers the lash line.
- Place tape vertically on the eyelid skin above the lash line.
- Lift gently upward towards the eyebrow and secure.
- Result: This lifts the heavy skin off the lash base, exposing the root for perfect attachment.
Pro Tip: Never pull the eye open. The eye must remain fully closed to prevent chemical burns. Always check from the front view to ensure the waterline is not exposed.
Safety First: Hypoallergenic Lash Tape for Sensitive Skin
A red eye after a service isn’t always from the glue fumes; often, it is a physical abrasion from the tape or pads. Prioritizing hypoallergenic lash tape for sensitive skin is a risk management strategy.
The Importance of “De-Tacking”
Even “gentle” tape can be too aggressive for the thin skin under the eye (which is 10x thinner than face skin).
- The Technique: Before applying any eyelash extension tape to the client’s face, stick it to the back of your gloved hand or your sanitized arm 2-3 times.
- The Goal: This removes some of the adhesive stickiness (“de-tacking”). It ensures the tape holds the lashes but doesn’t rip the skin (exfoliate) upon removal.
Tape vs. Gel Pads
Some clients are allergic to the collagen or hydrogel in standard eye pads.
- The Fix: Use Microfoam tape. It is hypoallergenic, latex-free, and provides a custom fit that doesn’t swell with tear moisture like gel pads do.
Healthline: Eyelid Dermatitis Causes
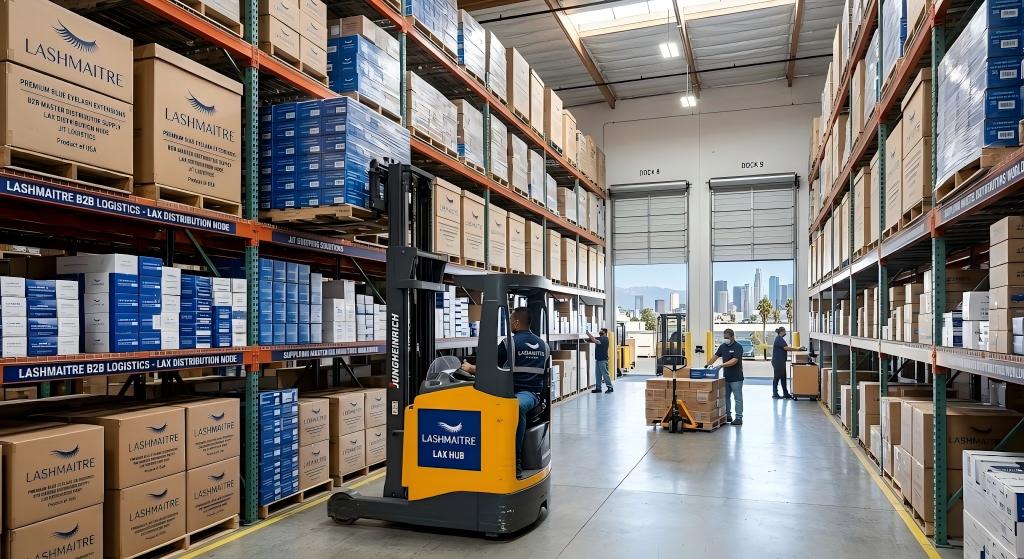
Sourcing Strategy: Wholesale Lash Supplies USA
For the B2B buyer, tape is a high-volume consumable. You go through rolls quickly. Buying from a generic medical supplier versus a specialized beauty supplier makes a difference.
Why Generic Medical Tape Fails
- Lint: Generic paper tape often sheds fibers (lint) when cut. If this lint gets into the lash adhesive, it creates a weak bond and an unprofessional look.
- Residue: Cheap adhesives leave a sticky, gummy residue on the client’s skin that is hard to remove without scrubbing.
The LASHMAITRE Standard
When sourcing wholesale lash supplies USA buyers should look for specialized beauty tapes.
- Lint-Free Micropore: Our paper tape is coated to prevent fiber shedding.
- Easy-Peel Silicone: Our silicone tape is designed to be repositioned multiple times without losing grip, reducing waste.
- Bulk Economics: Buying in bulk packs (10+ rolls) reduces the unit cost significantly, improving your profit margin per service.
Shop our Professional Lash Tape Bundle.
Advanced Hack: The “V-Shape” Isolation
This is a specific technique for clients with extremely dense natural lashes.
- Use two pieces of tape in a “V” shape.
- Place one piece pulling the left lashes to the left.
- Place the second piece pulling the right lashes to the right.
- This forces a gap in the middle, perfectly isolating the central lashes without needing to hold them apart with tweezers for long periods.
Conclusion: The Tiny Tool with Huge Impact
In the grand scheme of running a salon, eyelash extension tape costs pennies per client. Yet, its impact on the speed of your service, the precision of your isolation, and the comfort of your client is measured in dollars.
By mastering the layering technique, utilizing the horizontal pull for inner corners, and sourcing the correct medical-grade materials from LASHMAITRE, you elevate your artistry from “application” to “engineering.”
Don’t let tricky lashes slow you down. Equip your station with the right tape and turn every difficult set into a masterclass of efficiency.
Ready to speed up your lash sets?
Stock up on the essential tools that pros rely on.
Register for a Wholesale Account & Shop Lash Tapes
People Also Ask (FAQ)
Q: What kind of tape do you use for eyelash extensions?
A: Professional lash artists typically use a combination of three types of eyelash extension tape: Micropore (paper tape) for securing bottom lashes and mapping; Transpore (clear plastic tape) for lifting heavy eyelids; and Silicone tape for clients with sensitive skin or for “layering” techniques because it releases gently without pulling out extensions.
Q: How do you tape down bottom lashes for extensions?
A: To tape down bottom lashes, first ask the client to look up. Place a gel pad over the lower lashes, ensuring it doesn’t touch the waterline. Then, use a small piece of eyelash extension tape to secure any tiny lashes that peek out from the pad. “De-tack” the tape first by sticking it to your hand to reduce stickiness, preventing pain upon removal.
Q: Is silicone or paper tape better for lash extensions?
A: It depends on the purpose. For micropore vs silicone tape for lashes: Paper (Micropore) tape is better for securing the eye pad because it is rigid and stays in place. Silicone tape is better for manipulating the eyelid or holding back upper lashes because it is gentle, doesn’t rip out hair, and can be repositioned multiple times without losing its grip.
📅 Content Administration
- Last Updated: January 14, 2026
- Changelog:
- v1.0: Initial publication covering 4 types of tape and 3 advanced isolation techniques.
- v1.1: Added “De-tacking” safety protocol and 2025 efficiency data.
- Next Review Date: July 14, 2026
Grand View Research: Lash Tools Market

Lash Maitre: Your Trusted Partner in Eyelash extension Solutions
Lash Maitre is dedicated to providing professional insights and tips in the eyelash extension industry. Sharing the latest trends, techniques, and product knowledge, Lash Maitre helps lash artists and enthusiasts enhance their skills, stay inspired, and achieve the perfect lash experience.
Latest Post
Contact Us
related Post
-
Whitepaper: Macromolecular Chemistry and Logistics – What Type of Glue is Used for Eyelash Extensions?
Document Control & Status: 1. The B2B Procurement Fallacy in Adhesive Sourcing In the highly specialized ecosystem of professional aesthetics, the foundational pillar of any salon franchise’s operational success is the structural integrity of its adhesive supply chain. Yet, when evaluating overseas manufacturers, many regional procurement directors lack the specific chemical literacy required to properly…
-

Whitepaper: Traction Alopecia, PBT Weight Ratios, and the “Will My Eyelashes Grow Back After Eyelash Extension” Liability
Document Control & Status: 1. Introduction: The Corporate Liability of Follicular Trauma In the highly competitive, premium sector of the global aesthetic market, the most profound threat to a salon franchise’s recurring revenue model is not competitor pricing; it is the physical degradation of the client’s natural biology. Every academy educator, franchise CEO, and regional…
-
Whitepaper: Ocular Toxicology and Liability Management – Mitigating Blepharitis From Eyelash Extensions
Document Control & Status: 1. Introduction: The Corporate Liability of Ocular Complications In the rapidly expanding global aesthetic market, the profitability of a high-end salon franchise is deeply dependent on maximizing the Lifetime Value (LTV) of each client. However, this recurring revenue model is under constant threat from material-induced medical complications. Among the most prevalent…
-
7 Critical Supply Chain Secrets to Dominate the Blue Eyelash Extensions Market: A B2B Procurement Whitepaper
Document Control & Status: 1. Introduction: The High-Margin Potential of Blue Eyelash Extensions In the contemporary landscape of professional cosmetic services, the commoditization of standard black lashes has driven B2B procurement directors and salon franchise owners to desperately seek new avenues for premium upcharging. Offering specialized, avant-garde aesthetic services, such as seamlessly integrated blue eyelash…
-

Academy Profitability: The B2B Supply Chain Guide for a Brisbane Eyelash Extension Short Course
Article Management: 1. The Procurement Reality of a Brisbane Eyelash Extension Short Course In the highly lucrative Australian cosmetic education market, launching a brisbane eyelash extension short course requires more than just an experienced instructor; it requires an absolutely flawless supply chain. Many academy founders falsely believe that student frustration and low graduation rates are…
-
The B2B Science of C Curl Eyelash Extensions: Thermal Memory, Adhesion Physics, and Salon Profitability
Article Management: 1. The Commoditization Trap of C Curl Eyelash Extensions In the professional eyelash industry, the c curl eyelash extensions represent the absolute foundational baseline of any salon’s inventory. Designed to mimic the natural upward sweep of a perfectly applied mechanical eyelash curler, the C curl is universally applicable across almost all client eye…
-
Maximize Salon Revenue: Can I Apply Mascara to Eyelash Extensions? A B2B Retail Guide
Article Management: 1. The Golden Retail Opportunity: Can I Apply Mascara to Eyelash Extensions? In the hyper-competitive beauty industry, the most successful salons do not just sell time and services; they sell comprehensive, high-end cosmetic solutions. Every master educator, salon owner, and working lash artist has encountered the exact same anxious question from a first-time…
-
Maximize Salon Revenue: Can I Wear Mascara With Eyelash Extensions? A B2B Retail Guide
Article Management: 1. The Golden Retail Opportunity: Can I Wear Mascara With Eyelash Extensions? In the hyper-competitive beauty industry, the most successful salons do not just sell time and services; they sell comprehensive, high-end cosmetic solutions. Every master educator, salon owner, and working lash artist has encountered the exact same anxious question from a first-time…
-
B2B Profit Truth for Salons: Can You Curl Eyelash Extensions?
Article Management: 1. The Ultimate Client Frustration: Can You Curl Eyelash Extensions? In the highly competitive beauty service sector, long-term client retention is the only metric that guarantees a salon’s survival. When a client returns for an infill appointment or calls the receptionist to nervously ask, can you curl eyelash extensions, it is a massive…
-
B2B Profit Strategy: Can You Wash Your Face With Eyelash Extensions?
Article Management: 1. The Ultimate Client Fear: Can You Wash Your Face With Eyelash Extensions? In the professional beauty service sector, educating your clientele is the absolute foundation of long-term client retention. Almost every new client sitting in a salon chair will nervously ask their artist: can you wash your face with eyelash extensions? For…
